Category: Lesson Lab
Distance Learning Resource Round-Up for the 2020-2021 School Year
Hi! I teach English Language Arts to middle schoolers.
The idea of beginning the year 100% virtually makes me shit my pants from anxiety. In order to ease some of this distress, I spent the last few days compiling a list of everything I thought might be useful as we begin the 2020-2021 school year. While doing so didn’t help my nerves, I’m hoping it might be helpful to you!
If you want, you can also access the original Google Doc here or simply scroll down below.
See a link that looks good? RIGHT CLICK ON IT AND OPEN IT IN A NEW TAB. Otherwise it might not open in WordPress.
I’m sure I’ll keep tinkering with it over the next few weeks. ENJOY!
Speaking Your Truth Through Slam Poetry: A Unit Overview
“We’re doing poetry? I haaaaaaate poetry! It’s SO boring, Mr. Anderson!”
One of the easiest ways to make a room full of middle schoolers groan is to say the word “poetry.” I don’t blame them. The thought of analyzing the theme of “Hope is the Thing with Feathers” or any of the other nature themed poems that regularly pop up on standardized tests makes my eyes slide back inside my head.
A few years ago I began teaching a unit on slam poetry. Students responded immediately to slam poetry’s relevance, topics, and overall style. Slam poetry feels vibrant and current. And thanks to the internet, teachers now have access to cutting edge slam poetry written by people that look and sound like their adolescent students. I’ve taught this unit three years in a row, and it never fails to produce some of my students’ strongest writing of the year.
What follows is my basic blueprint for my annual slam poetry unit. This unit combines “just right” mentor texts with rock solid instructional activities. Because it requires students to be vulnerable, I typically save the unit for the back half of the school year. That way I’ve had time to build and sustain a sense of classroom community with students. Without vulnerability, slam poetry is nothing.
Unit Title: Speaking Your Truth through Slam Poetry
Time Length: Five weeks of 42 minute class periods
Final Product: Students will write, revise, and submit an original slam poem. While students do not have to present, they are encouraged.
Standards: These are from Virginia. I’m sure most states/Common Core have something similar.
- describe the impact of word choice, imagery, and literary devices on different poems (7.5d)
- analyze the themes of various poems (7.5a)
- write, revise, and edit original poetry that that incorporates word choice, imagery, and literary devices (7.7d, g, j)
Mentor Texts: Ten years of teaching English Language Arts has taught me that providing students with engaging, developmentally appropriate, and culturally responsive mentor texts from the “real world” is the most essential component of a successful unit. To that end, I’ve collected every slam poem I’ve ever used into a mentor text packet for you to make a copy of. Every poem in this mentor text packet has a corresponding YouTube video of the poet delivering (or ‘slamming’) their poem.
Content Warning: If you plan on using these poems, make sure you read through them first. For some of the poems I give a content warning and provide students with a chance to sneak out first. The poems here deal with topics such as: anxiety, depression, grief, ADHD, race, gender, substance abuse, technology, and religion.
Basic Instructional Sequence: The basic instructional sequence for this unit is adapted from the mentor text model described by Katie Wood Ray in Study Driven. Students begin by “immersing” themselves in slam poems. They listen, discuss, read, and write. The next step asks students to “write under the influence” of the mentor texts. Finally, students use specific texts and techniques to revise and deliver their poems.
Immersion Phase: Expose to students to the mentor texts. Get them reading, writing, and talking about them.
- Introduce the genre with a high interest slam poem (You can never go wrong with Touchscreen). Help students identify the difference between first and second draft reading. The former helps students access the content (the WHAT of the poem) while the latter gives students a way to analyze the craft moves made by the poet (the HOW of the poem).
- Introduce one poem a day to students. Watch them multiple times. Read them multiple times. Give students room to respond to the poems in a way that suits them. This is where I introduce “punctuation annotations.” Students read through the poems and mark up the lines with hearts, exclamation marks, question marks, etc. What surprises them? What lines can they identify with? Etc.
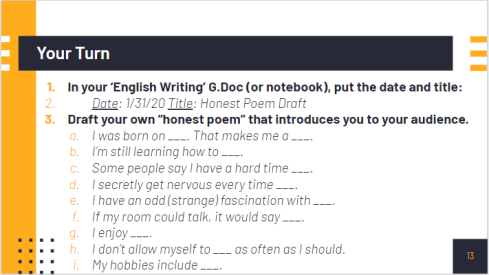
- Then, have students use the basic framework of the day’s poem to generate their own version. The goal here is to give students their own bank of writing to draw from when it comes time to commit to a draft. I always give students two options. They can just “go for it” and write something with the mentor poem on top of their brain. Or they can use a “poem frame,” a more sophisticated fill-in-the-blanks. This requires the teacher to use a poem with an easily identifiable and copyable format. Below is one of the slides I used from the excellent Honest Poem by Rudy Francisco. The bullet points on the slide come from lines in the poem that I adapted.
- Students end this phase filling out a simple “What is slam poetry?” handout. It has four basic questions about what slam poetry is, how it’s different from more traditional forms of poetry, and what they can write about for their own poems. Students have immersed themselves in slam poetry for about a week at this point, so there isn’t much scaffolding or direct instruction that happens here.
Writing under the influence: Students use the mentor texts as guides to help them write their own poems.
- The goal of this short phase is for students to complete their “down draft.” To just get something “down” on the paper. We’ll fix it “up” in the next phase.
- Students are encouraged to “talk back” to any ideas or stereotypes others might have about them. I typically introduce this idea by asking students to tell me what they assume about teachers. That we have no lives. That we live at school. That we hate kids. You can spend as much/little time with this as you want.
- Students can use any of their poem quick writes from the previous classes.
- Students can practice “lifting a line,” a simple technique where students pick a favorite line from a poem and use that to either begin or end their own original poem.
- I try to help them focus on quantity instead of quality at this stage. I shout “JUST WRITE!” a lot during this time.
Using Mentor Texts to Revise and Polish: This is where the real work comes in! Now that most students have a workable draft, it’s time to begin the labor intensive process of revision.
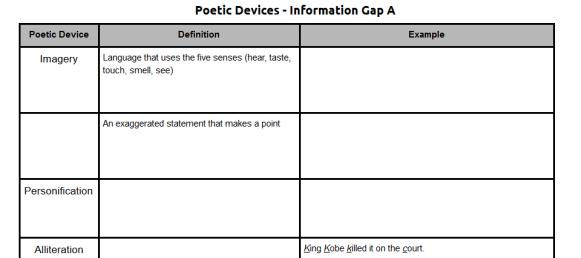
- To make sure we’re all on the same page with language, we begin this step by tabling our drafts and diving into language with an “information gap” activity. Students partner up, sit back to back, and try to fill in the blank spaces on their handouts. While each student has the same information on their sheets, the blank spaces are different. Since they can’t look at each other’s sheets, they have to do a lot of talking and thinking to complete their sheet. The student’s partner would have the B sheet, the mirror opposite of A. The order is different. That way students can’t just go “what’s the 2nd box on the first line.” Here are a few lines from the two different sheets so you can better visualize what I’m talking about.

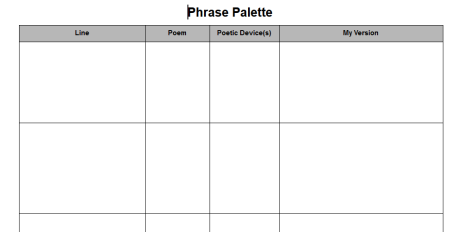
- Now that students have a resource they can turn to for figurative language, it’s time to dive into the language of the poems. I ask students to complete a “phrase palette,” a simple organizer where students copy down lines they love from our mentor texts, figure out what (if any) figurative language is going on in the line, and then try to copy it for their own slam poem. This is always harder than I think it will be, so plan accordingly. Here’s what it looks like blank.
- Once this is done, students fix up their drafts by revising their language. They use the information gap and phrase palette to help them. This is also when I do most of my individual conferring.
- The final step in this phase involves adding some killer rhymes to our poems. We begin by checking out/annotating/choral reading the best rhymes in the mentor texts we’ve been using. I do a short mini-lesson on inner and outer rhymes. I show them rhymezone.com. And then I give the class the first line of a poem about going to school. I tell them to write the next three lines of the poem, paying special attention to adding inner and outer rhymes. The key here is using a first line that has a lot of simple words to it. For instance, students had a lot of fun coming up with rhymes based on this first line: “I woke up, put some clothes on, and walked out the door.”
Presentation: Practice, practice, practice!
- To get ready, students read to the wall (your ears and eyes catch mistakes your brain misses), read to each other, record and listen to themselves reading, etc.
- I don’t do a lot of peer feedback because it’s an incredibly challenging skill that requires months and months of intentional practice. In my experience, students usually just pick at surface errors in each other’s writing. Afterall, this is what their teachers usually do to their work. The problem is that this doesn’t improve writing at all. It just makes folks not want to share.
- On the final day, I’ll throw anything and everything at kids to get them to present. Candy, extra points, names on the wall, whatever. We clap, hoot, holler, and snap every time we hear a great line.
Phew! That’s it. Like I said earlier, this unit produces amazing writing from my students. Many of them reference it as their favorite unit during the end of quarter/year reflections.
I put together a sparse Google folder with all of the handouts I referenced above. Feel free to take, copy, modify, whatever!
Categorize, Graph, Infer: A Lesson in Concept Development
Concept development activities make me nervous.
I remember back to my student teaching. We were about to begin reading George Orwell’s fantastic book 1984. So, to get ourselves thinking about some of the themes relevant to the novel, I cooked up an activity about surveillance. I don’t remember the specifics of the activity, just that I hooked up a few classroom SMART boards to video cameras. I remember spending hours trying to create an environment that challenged the way students thought about surveillance and social control. After running the kids through some elaborate scenarios, I stood in front of the class ready to receive their accolades. A kid with a giant shock of auburn hair raised his hand.
“Wow, Mr. Anderson. That sure was a fun way to waste time! Is it time to start the real work now?”
Concept Development work doesn’t lend itself to the realm of the purely quantitative. For me, helping students break down and explore overarching concepts draws more from constructivism than positivism/empiricism. Constructivist theories of knowledge, at their core, situate the central components of learning within cognition and the faculties of the brain. Even though constructivism comes in many flavors (cognitive constructivism, social constructionism, and critical constructivism, for instance), each method emphasizes the active creation of the learning experience.
As most method courses will tell you, constructivist theories (and therefore concept development) draw heavily from work of Jean Piaget. According to Piaget, the process of learning is one of continuous adjustment. The brain is constantly struggling to maintain a sense of equilibrium. It does this by struggling to understand new concepts using what it already knows (assimilation) and changing what it already knows to incorporate what’s new and different (accommodation). Any educator practicing a form of constructivist pedagogy needs to help students build connections between new content and what a he or she already knows.
There’s no one constructivist pedagogy. That said, constructivist teachers typically seek to help students make and expand on conscious links between themselves and the content. So, while planning my upcoming unit on the concept of ‘relationships,’ I knew I wanted to start out by helping students work through the meaning of the concept. Additionally, a previous memory of being eyeball deep in a ‘belonging’ unit only to have a student say “I still don’t know what belonging means” had been haunting me. I wanted to do a better job.
Day 1
A quick search for ‘concept development map’ on Google yields a wealth of resources. I fished around online, dug through a few books, and wandered through the halls of my own memory before settling on four simple questions.
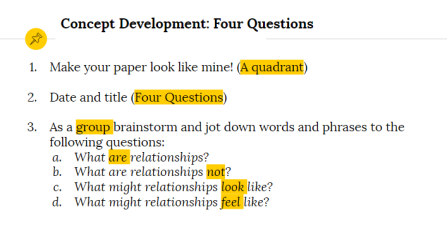
I wanted groups to tackle these questions because they’re actually quite complex. While students discussed and wrote down answers I circulated around the room, stopping a few times to wonder aloud whether relationships were always good or if it was possible to have a serious relationship with an inanimate object. I asked these questions to try and nudge each group beyond their established relationship schema that defined the concept as a dyadic bond between humans. My questions helped a few groups expand their answers to the four questions. The activity also let me get in a little ‘show, not tell’ practice. A relationship feels like comfort? Well, what’s comfort feel like? What about happiness? What might different forms of happiness look like? And so forth.
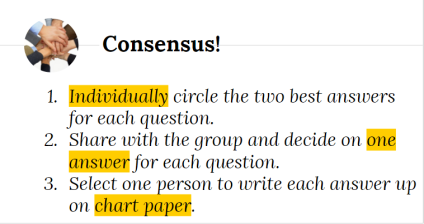
After brainstorming, I asked students to individually pick their ‘favorite’ answers to each of the four questions, share out, and then come to a consensus. One student from each group wrote each of the answers on pieces of chart paper hanging around the room. Next students did a quick gallery walk to check out everyone’s answers (which accrued mightily over the course of the day) and come up with their own definition for the word relationships. The final step was for each student share that definition with his or her group and then settle on one definition for the group.
Moving students in and out of group work is a definite hallmark of my teaching, for better or for worse. I try to strike a balance between difficult tasks best suited for a group (coming up with criteria, for instance) and individual assignments that allow for reflection and personal choice. The goal here is to foster an environment that honors introversion and extroversion in equal parts.
When each group settled on their definition, we threw them up on the board, debated them, and narrowed the options down to a single sentence. With Alfie Kohn’s adversarial majoritarianism in mind, I tried to create opportunities for students to push for consensus instead of merely asking them to vote. However, since I’m not that skilled at facilitating this sort of group discussion, the results weren’t stellar. Nor were they disastrous. At the end of the day I put the five definitions (one per period) on a Google Form for the students to vote on the next day. This might seem like a lot of work for a simple definition. I could have simply used a transmission approach and given it to them. But constructivism takes time. While we can’t obviously go this in-depth with everything, spending time creating a working definition of our overarching concept seemed worth it.
Day 2
After revealing the chosen definition, we went to work at bringing the concept a little closer to home. Earlier in the month I decided to split the unit into three sections; our study of relationships would cover objects (what objects do we cling to? what might that say about us?), places (what places do we hold dear? why are physical and online spaces so important?), and people (how do our relationships with people sustain us?).
We started out by examining the important P/P/O in the life of Cadence, the protagonist from our last read aloud, The Girl Who Was Supposed to Die. I had students begin with a fictional character because I wanted them to be strategic in their choices. In a well-written novel everything exists for a reason. Details typically serve larger goals of plot movement, character development, etc. Groups made lists of objects, people, and places and we discussed why each one was essential to the protagonist. I took the opportunity to throw in some more abstract questions. How would the plot have changed if Cadence gone to the police instead of ranger station? What effect did Michael Brenner’s cell phone have on the plot?
I then asked students to brainstorm the most important people, places, and objects in their lives. My hope was that they would choose their own answers with the same amount of care and deliberation as the novel’s. Next they picked the top answer for each category, wrote it on a sticky note, and posted it in a designated spot in the room. Here’s what the walls looked like about halfway through the day.


We took some time for a few off-the-cuff observations, but by the time the dust settled we barely had enough time to squeeze in our read aloud.
Day 3
The final day of concept development required students to analyze the data. In this case the data sets were the accumulated sticky notes for the three categories. Since drawing conclusions can be a fairly advanced skill, I spent a significant amount of time modelling the process. Before the day started I went through the objects category and took stock of every sticky note. I counted them (pretty easy considering 75% of students listed their phone) and then played around with putting them into different categories. The strategy of collecting information, categorizing, sub-categorizing, and etc. comes from Hilda Taba. I think it’s an incredibly powerful way to organize and draw conclusions about things. Once I had my categories straight I drew out a few crude bar graphs to make sure everything worked.
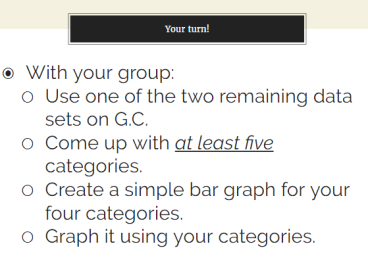
I walked through the process with students, relying on standard think-aloud protocols. I made sure to get student input on the final phases of my graph. Although I knew the ‘answers’ before hand, I wanted to make sure a few specific students were still with me and able to predict the next step (a severely truncated version of what’s commonly referred to as the gradual release model). After spending a fair amount of time on this I gave students their marching orders. Categorize, group, graph, and draw conclusions based on one of the two remaining data sets.
We spent the final minutes of class discussing everyone’s findings. Some of the questions turned out to be conversational goldmines (Why, for instance, did students mention ‘Mom’ five times as often as ‘Dad?’) while others were duds (Why didn’t any student list ‘school’ as his or her important place?).
Conclusions
The students appeared to enjoy the concept development activities and discussion. Although it certainly wasn’t perfect, nothing is and that’s not the goal. These three days, especially the graphing component, were the result of much hand-wringing and brainstorming. I’m lucky to have a great thought partner next door, Mr. Carter, my team’s math teacher. The time we spent spitballing ideas during our planning periods was enjoyable and useful.
Have any concept development activities that you love? Please share!
The Head, the Heart, and the Hands: Our New Approach to Classroom Portfolios
Background
When I started using portfolio assessments last year (instead of grades and tests) I relied on the classic four language domains: reading, writing, speaking, listening. Students would select an artifact representing their work in each category. The first semester of this year I decided to eschew categories in favor of analogies. While I (and the students) enjoyed the analogies, I felt the portfolio was missing its core (or, to use Elbowian language, a center of gravity). I wanted our Quarter 3 Portfolio to include some new categories. I decided to focus on the body, specifically the work done by the head, the heart, and the hands. This post provides an overview of our process and how it worked out. And, as with every assignment, there is real value in doing this with the students.
Categories and Artifacts


For the head, students listed words like think, analyze, problem solve, decide, and compare. They said the heart might feel joy, sorrow, exhaustion, excitement, anxiety, and hope. And lastly they explained that their hands wrote, erased, tapped on screens, colored, flipped pages, put up sticky notes, and folded.
Students then had to pick the word that best described the quarter for each part. For instance, a student who did a lot of analysis might go with ‘analyze.’ Once students had their words down, they selected an artifact (something we did in class during the quarter) that best represented that word. That student who chose ‘analyze’ might go with a Flash Fiction draft that required him to analyze the components of the genre to make sure his piece was authentic.
One Organizer to Rule Them All

First quarter I provided too little in the way of guidance. Determined not to make the same mistake second quarter I ended up going too hard in the other direction. Students told me they were overwhelmed by the organizers. For the third quarter I tried to create a simple organizer that contained almost everything a student would need. Each column had the same instructions in it, but I slightly altered the font for each artifact to try and help the eye differentiate. The directions moved left to right. So whenever a student was done with a particular box they could draw a giant X through it. This helped them understand the sequence as well as provide a visual cue for progress.
At this point students wrote in their word and artifact on the left-hand side and completed the first square for each category.
Improving Our Artifact Reflections
Without proper planning, portfolios can become nothing more than a summative task, a way for students to show off what they’ve achieved over a semester. While there’s certainly nothing wrong with this, there isn’t much in the way of ‘learning’ going on when someone is merely putting on an exhibit. I find there’s value in helping students take the time to thoroughly process each artifact they choose.
I wanted to improve the reflection process this quarter. Using Starr Sackstein’s blog about teaching reflections (and receiving valuable feedback from Jana Maiuri), I settled on a sequence of activities to help students figure out ‘what should a great reflection include?’ Asking students to play a central role in selecting criteria for an assignment is a common and effective strategy. Students completed gallery walk, taking notes on various reflections posted around the room. What made each one effective? We took our time answering guiding questions on various pieces of chart paper and voting as a team on the most valuable components of a reflection.

I took the most popular results (using my professional judgment to add or remove anything) and typed them up. Students spent a little time trying out different brainstorming strategies before inserting their artifact reflections into their Google Slides portfolio template. Here’s what students ended up using to drive the content and form of their reflections:

Grade Evaluation Essay
This is the final major component of the portfolio. As I’ve mentioned many times, I do not assign grades, quizzes, or tests in my classroom. My district, like most, still requires me to input a letter grade for each student at the end of the quarter. The Grade Evaluation Essay is my compromise. In order to try and help students grapple with synthesizing an entire quarter’s worth of work into one letter and one small essay, I created three scenarios. Although I haven’t used this lesson yet (that happens the next two days), I wanted to share my process. Individually and in groups students must read the following scenarios and decide A) what grade each of the fictional students ‘deserves’ and B) what factors/criteria/categories will be used to arrive at that grade.

Each student is a composite of popular behaviors and typical classroom occurrences. The items along the top are the major assignments of the quarter. My goal was to create scenarios without a clear “first, second, third” ranking. Kiersten, Melinda, and Javier all have strengths and weaknesses. By working as a group, students should be able to better leverage each other and bring multiple perspectives to bear on what is a complex task. Without cooperative learning, this task would be outside the Zone of Proximal Development for many of my students.
After trying to come to a consensus (regardless of outcome), we’ll write out each group’s grading factors. On the reverse side of the page is the same organizer sans writing. Each student will then use a few of the factors to brainstorm their own journey through each of the assignments. Finally they will turn their brainstorming into their final Grade Reflection Essay. The idea here is that the brainstorming page will move them left to right, from evidence to final statement. I haven’t written my own Grade Reflection Essay yet, but I’m excited to open myself up to students in a new way.
Preliminary Conclusion
The reflections look better than previous quarters. They’re more focused on specific learning and discovery. I’m excited to see how the Grade Reflection Essays turn out. If I stick with the corporeal theme next quarter, I’ll probably substitute ‘hands’ for ‘mouth.’ I’ll also do a better job trying in the body parts to the reflections. Ending up with a grade goes against much of what I believe in, but knowing when and where to compromise is key. I’ll look to update this post after the full results come in. Lastly, along with the two aforementioned educators, I’d like to thank Mr. Carter (my team’s excellent math teacher) for providing valuable feedback along the way.
Lesson Lab: Autopsy of a Photo Blog Project
Introduction
This post marks the first installment of a new blog series: the Lesson Lab. I wanted to create a space to explore the projects we complete in my 7th grade English class, warts and all. So what follows is an analysis of my most recent classroom project: photo blogs. This post tracks the project from inception to completion while providing room for commentary.
My classes had just completed a project based on responding to literature. In my mind the page response was a somewhat insular assignment. Students focused their energies on the mini-universes contained within the favorite pages of their independent reading books. So I wanted our next endeavor to face outwards, to interact with the lived experience of daily student life. I made a wish-list for our next project:
-deals with “the real world”
-local in scale
-incorporates visuality
-reaches an audience greater than the classroom
-allows each student to explore an aspect of ‘belonging’ that he or she is interested in
I dropped each item into my brain and crunched on them for a day or two until a idea appeared materialized: a photo blog. I had recently read an Education Week photoblog on the resiliency of transvestite students, so the genre was sitting on my brain. My students would engage with the larger community around them, using images and words to investigate how we interacted with one another and how we exclude each other.
Finding the Materials
I spent a couple of days perusing the internet to find suitable photo blogs. The process of finding mentor texts is one of the most time-consuming portions of any unit, I think. A tiny cottage industry has sprouted up around the acquisition and curation of teacher-vetted mentor texts (see here and here, for instance). This makes sense. Finding texts that are authentic (not from a workbook), engaging (current buzzword for interesting), not too long, and appropriate in content can be an incredible time sink. Most of the blogs I found had either too many words and not enough pictures or were too image heavy and lacking on the text side.
I ended up going with Full Frame, Education Week’s online repository of interesting photo blogs and visual essays. Although the material at Full Frame deals primarily with education issues, I figured there was enough variety to interest most children: the Baltimore riots, school lunches from around the globe, the Columbine massacre, and the struggles of recent immigrant families, for instance. While not directly situated in the pop culture zone I hoped the content on the website would appeal to students’ interest in right and wrong. I also wanted to expose them to the plurality of adolescent experience across the world.
What do you notice?
The next stage of the inquiry process is immersion, the time when students surround themselves in mentor texts in order to figure out what makes the genre work. I wanted students to dive into the photo blogs and walk around inside them. What made them tick? How were they organized?
Although I LOVE making and using graphic organizers, I consciously stayed away from giving students a way to organize their noticings this time around. A big part of the inquiry approach is allowing students the freedom to come up with things on their own. Having a preordained structure or set of questions seemed to A) rob students of the ability to stumble upon their natural noticings and B) insert too much of myself into the process. In an inquiry-centered classroom, the student plays a primary role in determining the curriculum. By inserting anything he or she deems essential for understanding, the teacher contours the flow of the lesson instead of controlling it.
The noticing portion of the lesson is where things began to break down. Students didn’t seem very interested in the mentor texts. In retrospect I should have spent more time finding suitable photo blogs to study. Students weren’t keen on “walking around inside” the photo blogs, either. After reading and making observations on a series of photo blogs, I told students to document what they noticed on a Padlet I had set up for each period. Here’s a period’s Padlet.

Although the noticings on display here are somewhat limited in scope, students were able to touch on the basic elements of a photo blog: content (current and/or important events), format (exploring a topic through the combination of words), and a few text features (images, captions, title in bold). And any superficiality of observation points to nothing other than my own failure setting it up.
I called in one of my colleagues to offer some feedback on just what was going wrong. The following chunk highlights the consequences of my failure to provide more structure on the front-end.
Most of them were fine browsing the photoblogs on their own. But maybe a half sheet paper would have focused those who weren’t sure what to write (even though you have it clearly written on the screen).
The writing part was lost on them. Maybe they could have made a chart in the notebook before they moved to their groups. XXXX was the only one to get started independently. XXXX did as well. XXXX’s group then got started.
The feedback is spot on. I’m certainly not saying that a mere graphic organizer would have radically altered the trajectory of the initial days of the project. The amount of factors interacting at any one time in a classroom resist any sort of totalizing ‘one cause = one effect’ logic. But my colleague’s feedback reminded me to think through the ramifications of seemingly simple classroom decisions.
After charting our noticings, students answered three basic questions about photo blogs. First, what topics do photo blogs cover? Then what type of work do photoblogs seem to require? And lastly how do authors of photoblogs make their work compelling? Students put their answers up on large sheets of butcher paper around the room. The goal here is to saturate the analog and digital space of the classroom with information about photo blogs. Here’s one of the charts.

By this point students had spent a couple of days immersing themselves in photo blogs and coming up with a definition of exactly what this genre is, what it attempts to achieve, and how it attempts to achieve it. We knew we had to create a brief intro, a body composed of pictures and captions, and a brief conclusion.
Taking the Pictures
I wanted my students to pursue the concept of ‘belonging’ in their own way. This meant each student had to develop a central question to guide his or her work. We accomplished this by typing out potential questions into a shared Google Doc for all to see. Again one of the goals is to surround students with questions and information to remind them of all the different avenues of thought for whatever we’re working on at the time.
Students’ questions were great. Here’s a screenshot.

So, with questions firmly in head, we were ready to break out into the hallways of our middle school and take some pictures. In a rare moment of foresight, I made sure to send out an all-staff email a few days prior explaining that 7th graders would be storming through the building to take pictures. Unfortunately that’s about as detailed as my picture-taking plans were.
In my mind I saw kids slinking around the building like investigative reporters, documenting that fantastic mixture of banality and triumph that middle schools seem to produce in spades. This didn’t happen. Instead students ran through the hallways causing a ruckus, taking selfies, and busting down classroom doors to get the drop on unsuspecting classrooms. Of course that happened. 7th graders let loose in sacrosanct hallways armed with connected weapons of disruption.
I was mortified. My students were acting rambunctious and disruptive. I often feel like my command of a class is one child’s exaggerated sneeze away from total disarray. I can only imagine how distracting it would be to have a bunch of small faces popping through doorways and peeking through window blinds.
I took a few minutes at the end of the day to debrief on the experience with my students. Much to my surprise, many of them mentioned how awkward they felt. Many of the girls in particular expressed a surprising level of unease with the entire endeavor. I didn’t know what to say. I hadn’t considered the inherently invasive nature at the core of this project. I felt terrible. I’ve documented my difficulties with perfectionism before, so I won’t belabor the point here. Although I will admit that a part of me reveled in the “chaos.” What’s wrong with running around and having fun?
Seeing finding me perched despondently at my desk after the final bell, my team’s amazing math teacher reminded me that the best lessons aren’t always the ones where students walk away feeling happy. He said that taking risks and pushing our boundaries is, for most people, an inherently unpleasant process. Learning is in many ways a disturbance to our cognitive sense of equilibrium. For this project it was clear that both the students and I were outside of our comfort zone.
A slight change in direction
En route to work the next morning I had a minor epiphany: interviews. By requiring my students to speak with others about issues of belonging at our school I could A) minimize hallway disruption, B) increase student-to-student interaction, C) insert some structure into the process, and D) include interview segments (an important part of the photo blogs we examined).
So as soon as I got in that morning I sent out a few emails to other teachers to set up times for my class to come in and interview other students. This phase of the project was a success. Kids wrote follow-up questions to their main belonging question, interviewed one another, and got permission before taking pictures. After a couple of days of taking pictures in class, out of class, during lunch, etc., it was time to begin making our photo blogs.
The creation phase
Although the photo blogs we examined as a class were all single page documents, I knew we had to go a different route. Anyone who has used Google’s Documents app on the iPad can attest to its stupefying lack of features. We needed an alternative. Since we’d used Google Slides for our Q1 electronic portfolios, I decided to go with a Slides presentation for the photo blog. Students already knew how to create links, crop images, add captions, etc. Most students required two to three full class periods to complete their five slide (minimum) photo blog.
To help students write their conclusion, I asked them to try and figure out what story their words and images told. What did their interviews reveal about belonging at our school? How did each image contribute to the overall thrust of the presentation? The image below is a quick organizer I put together to help students work through these fairly abstract questions. The text in each box is from the photo blog I created concurrently with the kids.

To help the photo blogs reach an audience larger than the four walls of my classroom I asked students to insert a QR code into their favorite slide. I then printed out each student’s QR code slide. Students put their slide images up on display all around the building. Since my district has a QR code reader on its app catalogue, every student and faculty was able scan the code and access each child’s entire photo blog presentation. I thought this was a fantastic way to get around the understandably strict internet policies at my district. Many of the kids seemed non-plussed.
How did they turn out?
I pulled the following images from a diverse range of students.


Final thoughts, or the difference between what we see and what we get
This project fought me every step of the way. I didn’t build in time to help students edit their photo blogs, and as a result almost every project contains a handful of typos. I also didn’t push students hard enough on the analysis sections of their conclusions. I should have found a way to help them take their findings to the next level. I (and most likely you) can rattle off a list of the many pedagogical failings at work on this project. I will return to this project next year. The potential for students to interact and comment on their school’s culture is too great to ignore.
Thanks for reading the first Lesson Lab installment!
